> For the complete documentation index, see [llms.txt](https://docs.finch3d.com/llms.txt). Markdown versions of documentation pages are available by appending `.md` to page URLs; this page is available as [Markdown](https://docs.finch3d.com/docs/projects-and-variants/massing-studio/customize-your-mass.md).
# Customize your mass
You've gotten your building into Finch- now what?
### 1. Set story heights
{% hint style="info" %}
Story heights are controlled directly inside of Finch
{% endhint %}
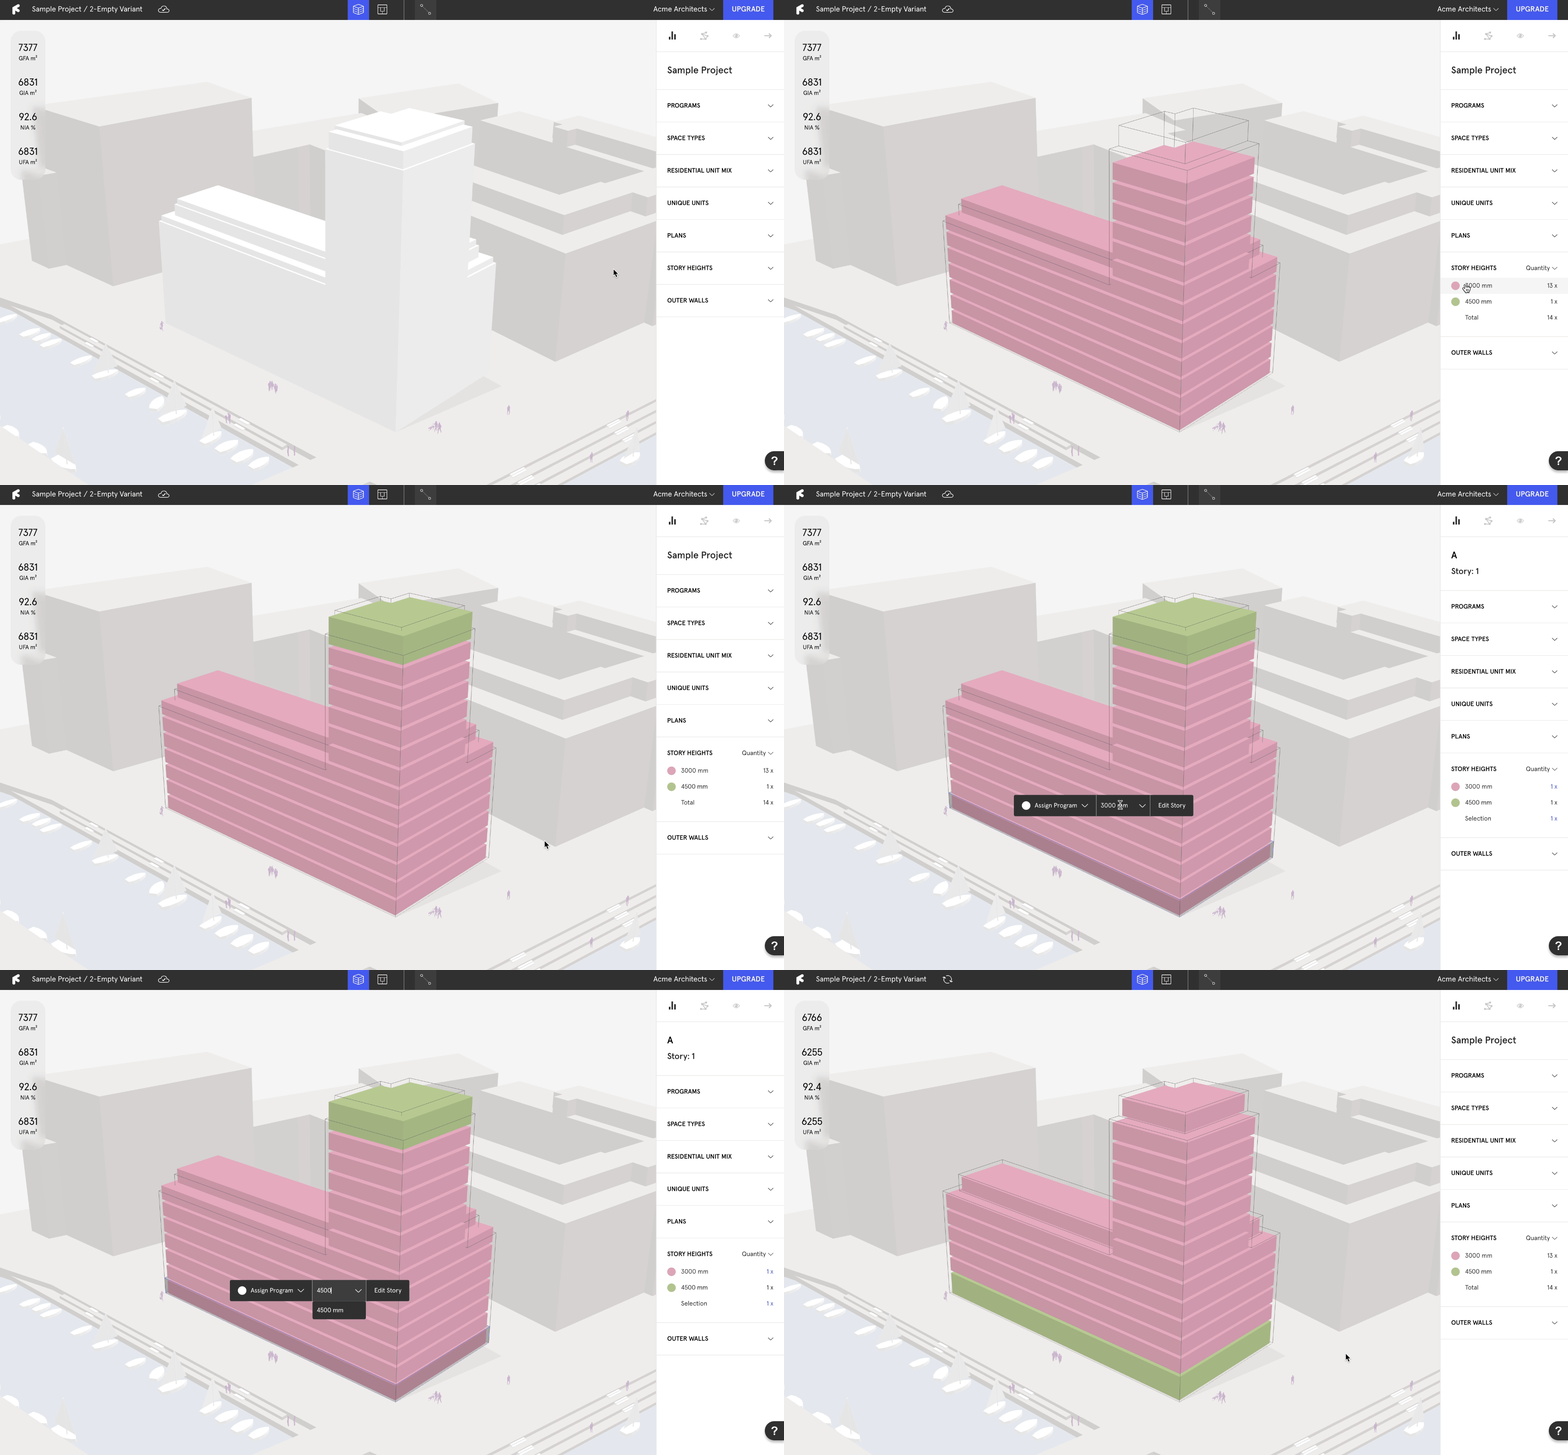
* In the **`Massing Studio`**, select a story in the building (hold shift to select a range, hold Ctrl to select multiple specific stories).
* The value in the center of the context menu (3000 mm) is the default story height. Fill in a new height for the selected stories, and the remainder will be calculated and added to the top floor.
* The **`Story Height`** accordion menu on the right panel displays the different story heights and quantities within the building.
### 2. Set wall widths
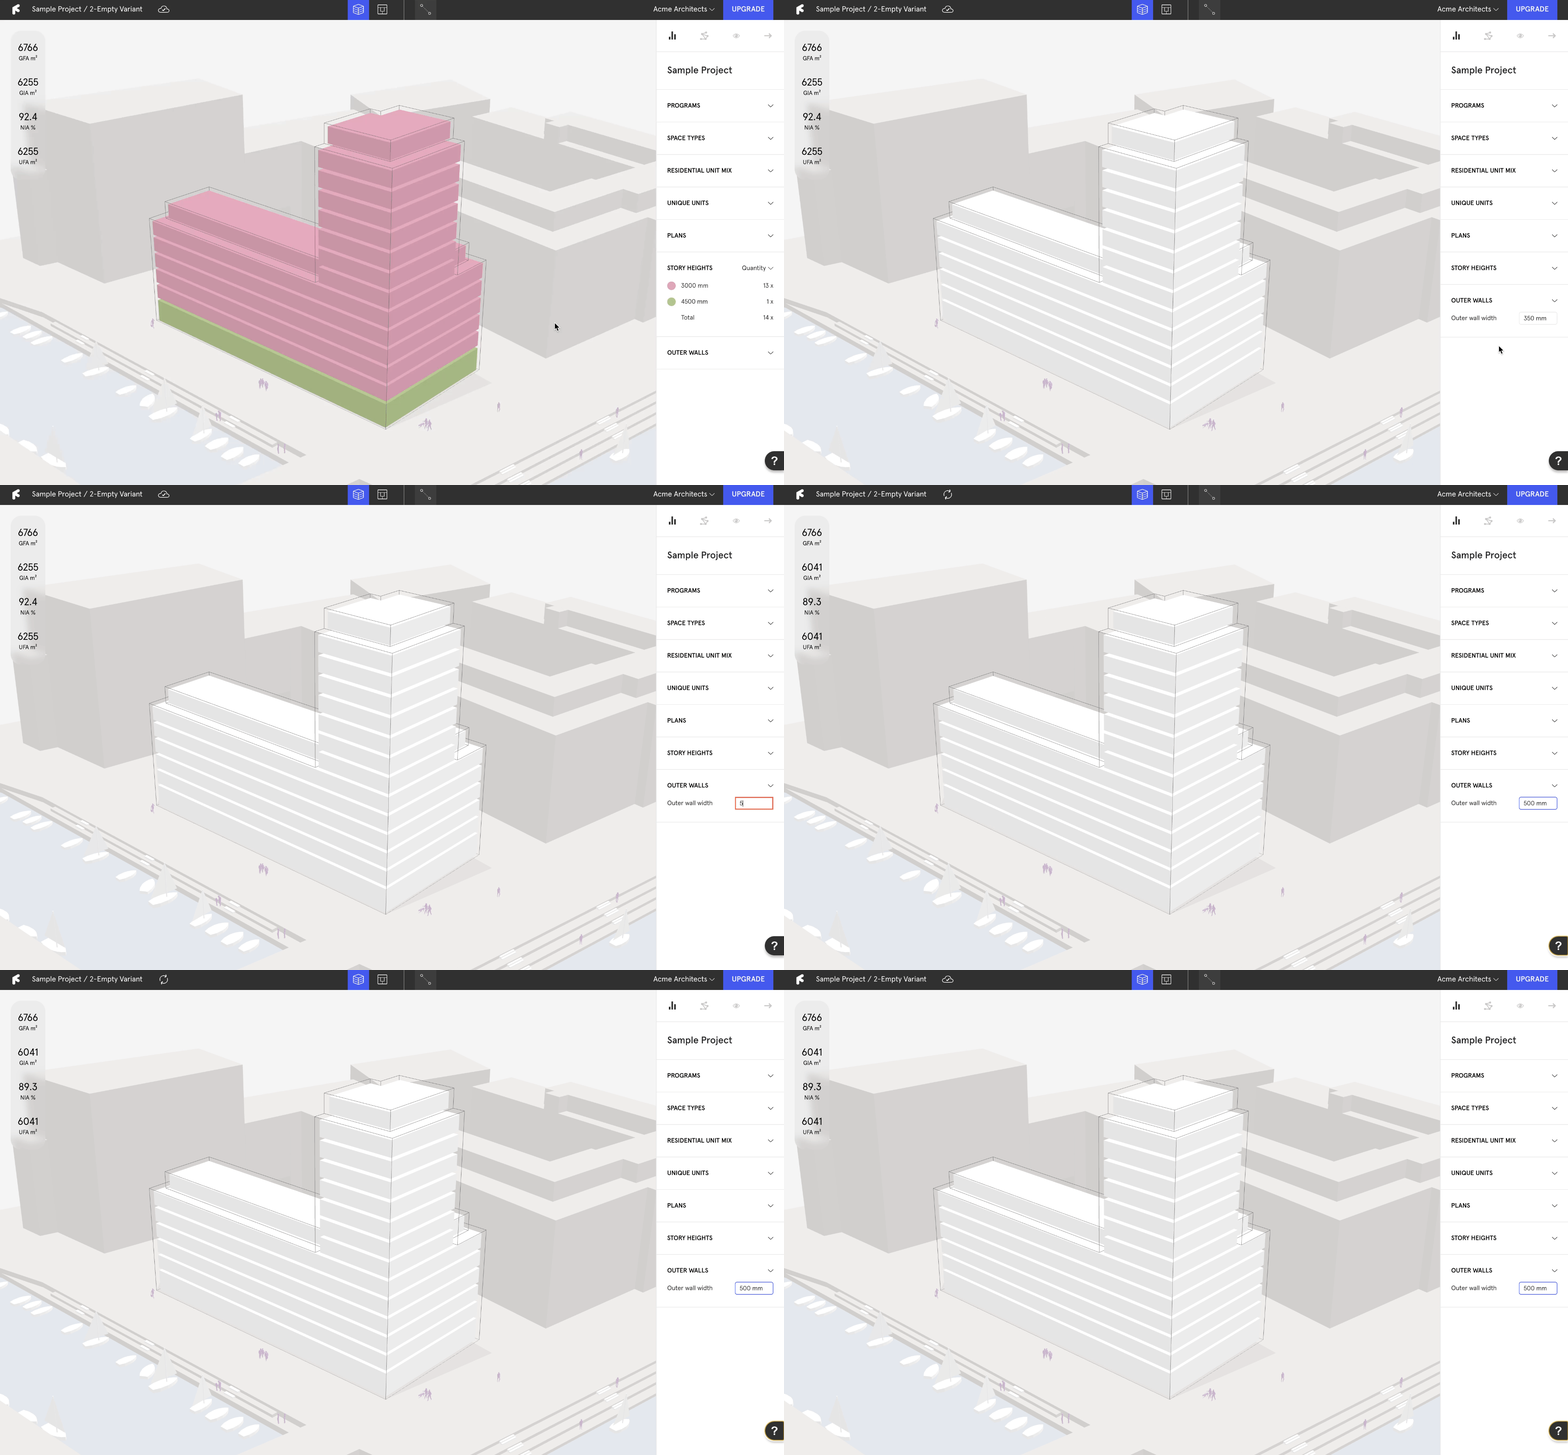
* Navigate to the **Outer Walls** menu at the bottom of the right panel.
* Input your desired outer wall width and press **`enter`**.
### 3. Assign programs
{% hint style="info" %}
Programs allow for detailed and customized massing calculations while also providing an overview visualization of the building’s makeup.
{% endhint %}
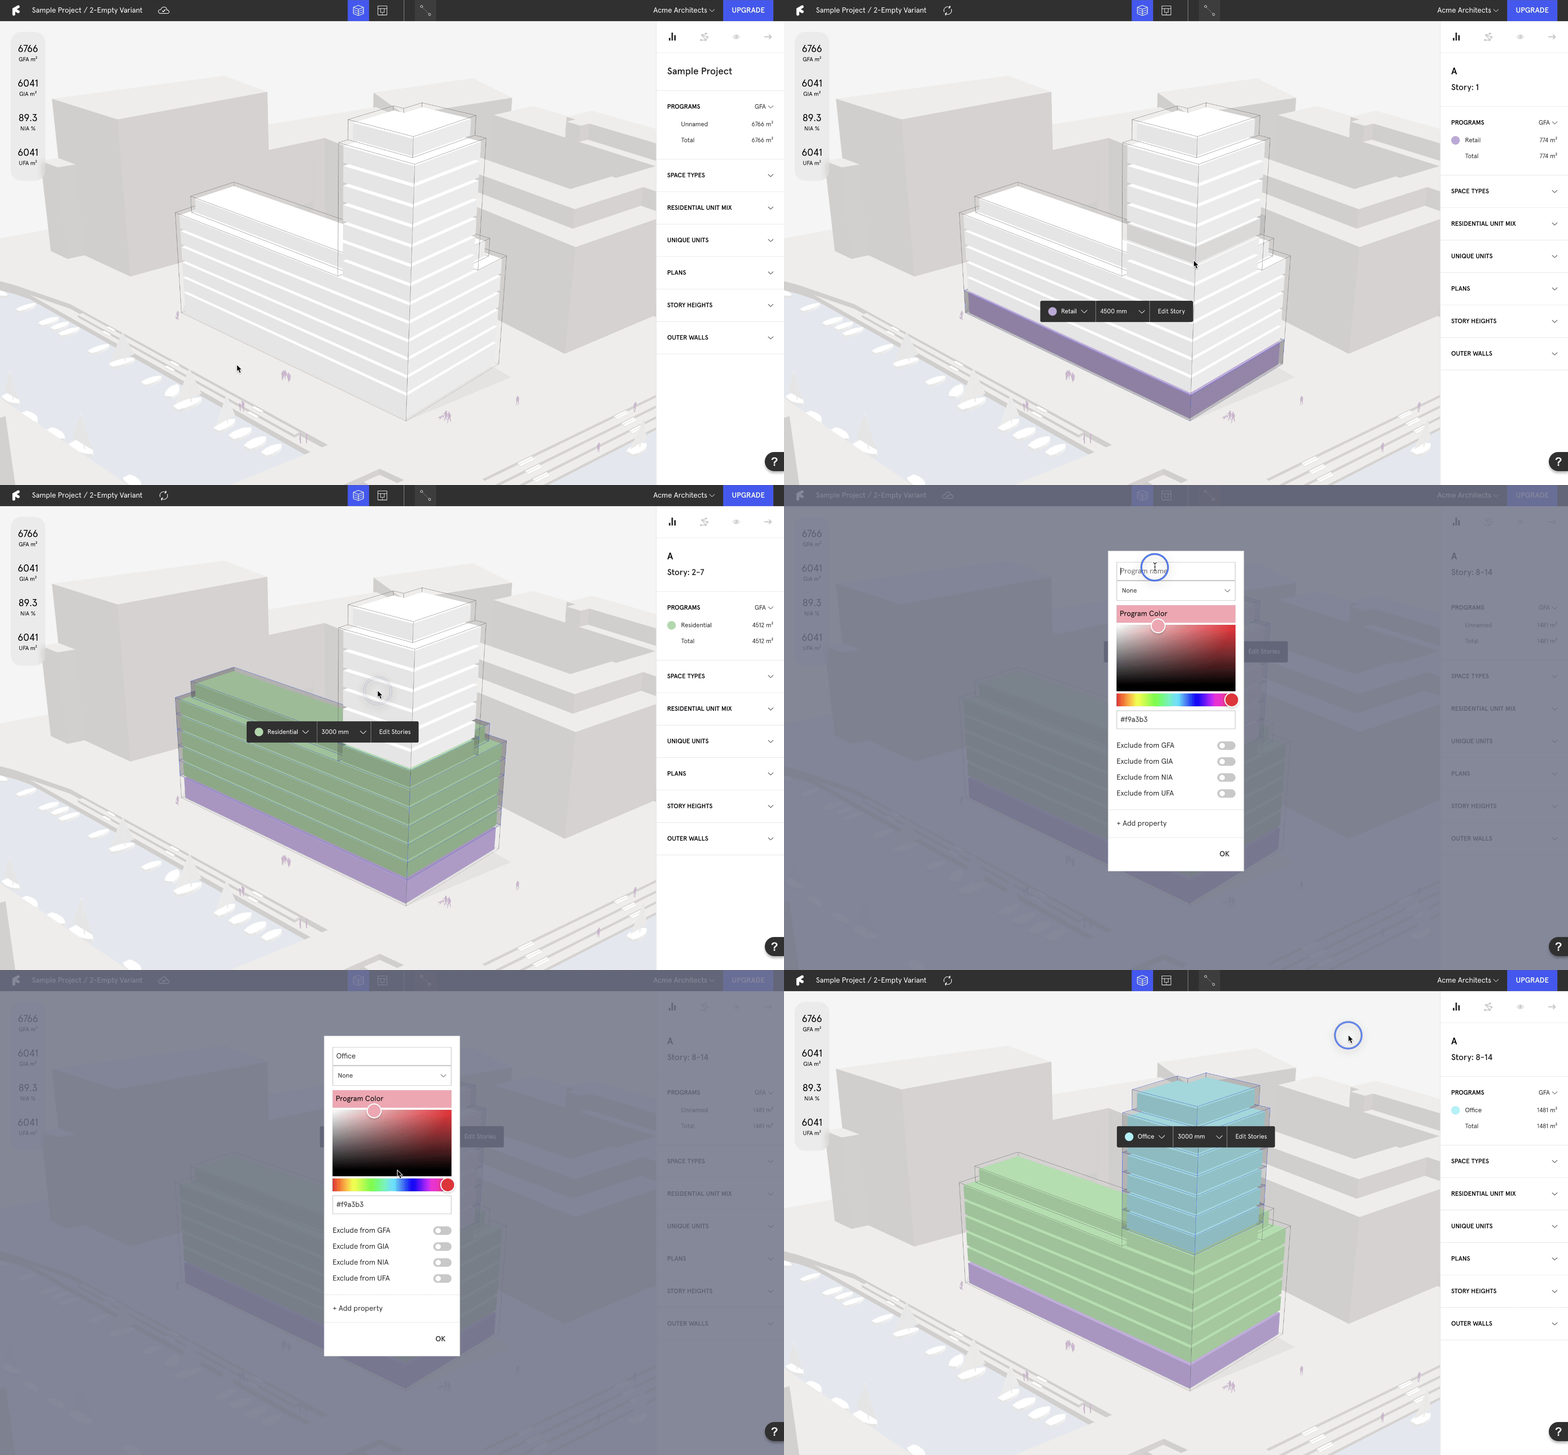
* Select a range of stories and hit **`Assign Program`**, choose one of the presets or select **`Create new program`**.
* Enter a name, select a color and hit **`OK`**.
***