Finch Guide
  • Overview
    • Welcome to Finch!
    • New Features
    • About
    • FAQ
    • Roadmap
    • Sign Up Here
  • First Steps
    • Create an account and Install Plug-ins
    • Upload your first building - Rhino
      • All about Rhino
    • Upload your first building - Revit
      • All about Revit
    • Upload your first building & context - Forma
    • Advanced: Uploading Walls
  • Massing Studio
    • Customize your mass
    • Calculate Data
  • Floor Plate Studio
    • Generate Unit Mix & Stairwells
    • Generate Unit Mix & Corridors
    • Generate Unit Mix around Circulation
    • Algorithm Theory
  • Unit Plan Studio
    • Adaptive Plan Library
    • Assign Adaptive Plans
    • Enterprise - Generate Unit Plan
  • Fundamentals
    • Tools & Commands
    • Iterate with variants
    • Add context geometry (Rhino)
    • Export
  • Grasshopper
    • Grasshopper - Upload
    • Grasshopper - Download data
    • Grasshopper - Advanced
  • Resources
    • Keyboard shortcuts
    • Feature Bank
    • Video Tutorials
  • Account Details
  • Contact Us
Powered by GitBook
On this page
  • 1. Get data calculations
  • 2. Assign custom properties
  • 3. Edit your building in Rhino
  1. Massing Studio

Calculate Data

You've gotten your building into Finch- now what?

PreviousCustomize your massNextGenerate Unit Mix & Stairwells

Last updated 2 months ago

1. Get data calculations

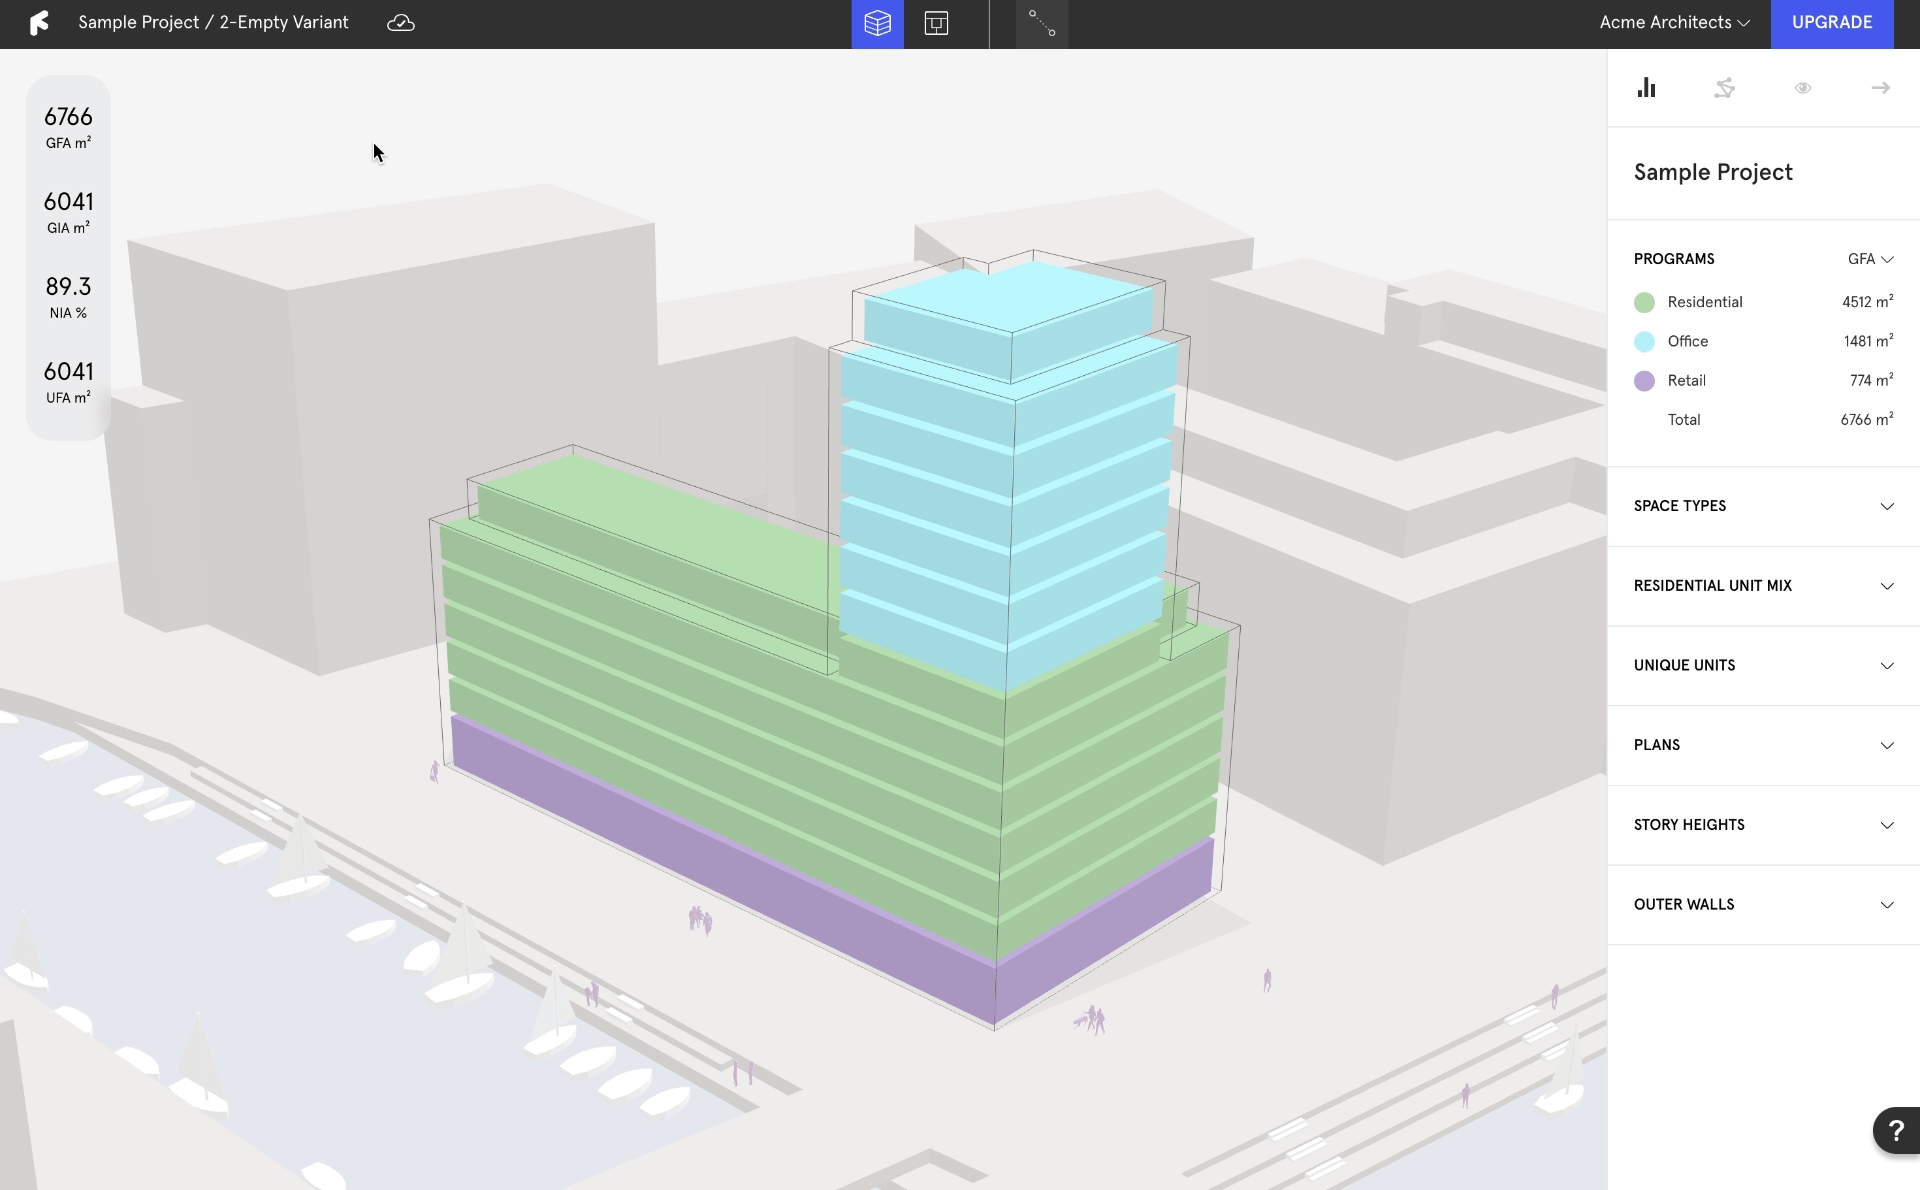
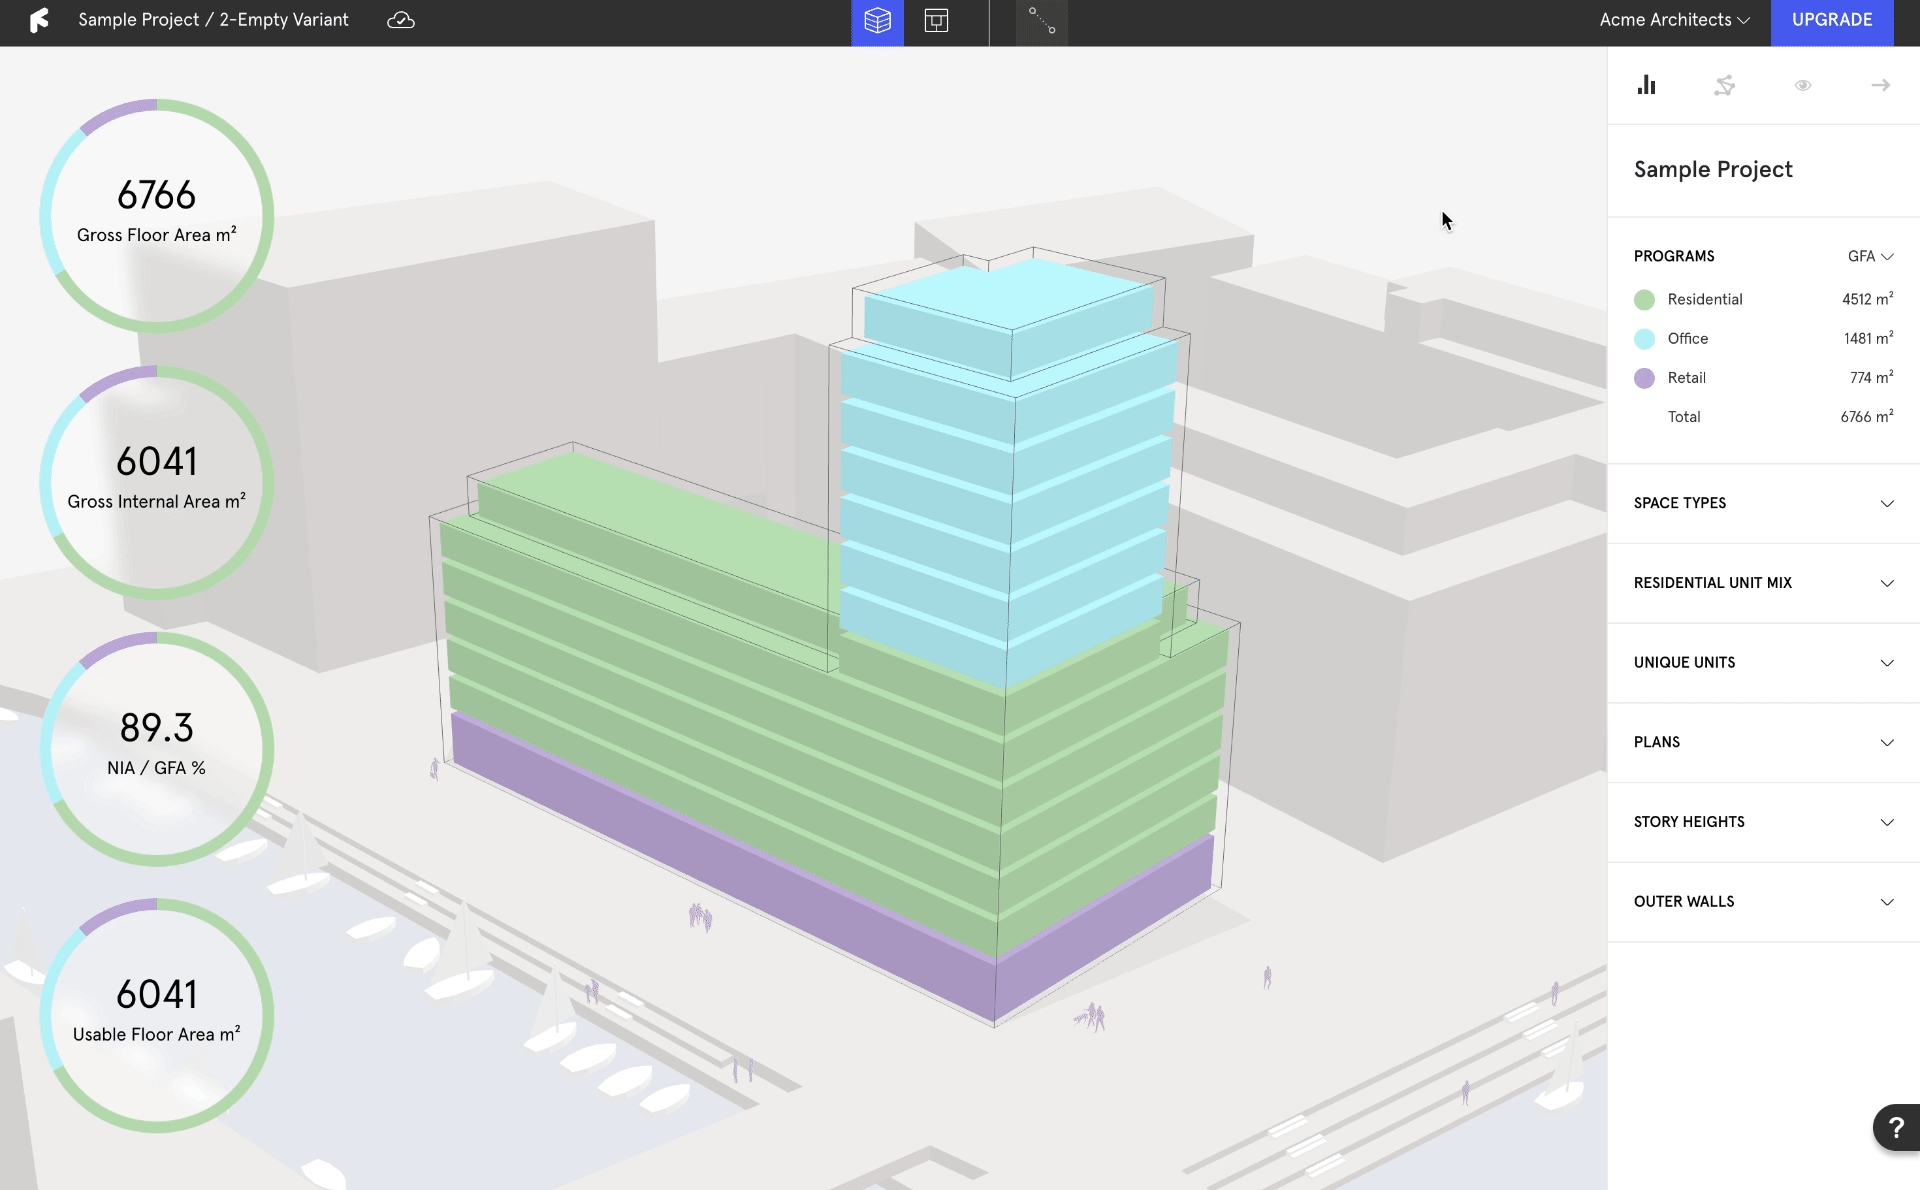
Finch Key Figures calculate the hard data of design restrictions to allow for an early understanding of a design’s parameters. Massing data is displayed on the right side of the screen, and can be minimized by clicking directly on the key figures. Data is updated in real time and can be affected by building mass, story heights, wall thickness and program exclusion.

Key Figures Metrics

The left side of the screen displays the project's key figures: GFA, GIA, NIA, and UFA. These measurements provide a comprehensive overview of the building’s total, internal, and usable spaces, aiding in planning and analysis.

GFA (Gross Floor Area)

The Gross Floor Area figure displays the total floor area in the building and the division of GFA according to program.

GIA (Gross Internal Area)

The GIA displays the GFA with the outer walls of the mass removed.

NIA (Net Internal Area)

The Net Internal Area figure displays the percentage of NIA out of the GFA. Changing the wall thickness will affect the NIA. Net Internal Area is the usable area within a building measured to the internal face of the perimeter walls at each floor level.

UFA (Usable Floor Area)

UFA displays the areas of all the rooms / spaces in the building, measured to the external face of the wall.

Excluding Programs from Key Figures

Programs can be excluded from the NIA and GFA by toggling on “Exclude from NIA / GFA” in the program editor. This will remove the program from the NIA / GFA calculations.

2. Assign custom properties

Custom Properties allow architects to create their own data calculations, such as budget or emissions.

  • Right-click on a program in the Programs accordion, and select Edit.

  • In the program editor, select Add property.

  • Set a value, relate it to the NIA or GFA, and set a unit.

Residential Budget example: (1500, NIA, € = €1500 per sqm NIA)

Residential Emissions example: (70, GFA, kg CO2e = 70 kg CO2e per sqm GFA)

  • Under the GFA drop down menu in the right panel Programs accordion, find and select the new custom property to display the data.
3. Edit your building in Rhino

Not quite met your GFA targets, or want to test adding another floor? It's quicker than ever to make design changes and get instant feedback:

  • If you have Auto receive changes from web app turned on in the plug-in, your Rhino model has been syncing with all the changes you have made in the web app.

  • Otherwise, Sync your model and select the web-app version.

  • Make changes to your mass; stretch, scale, add another building, etc and Sync.

  • Back in Finch, the data has updated according to the edited building, but all customization and assignment remains.

To edit your building mass using Revit, simply upload the edited mass to the same variant to overwrite the current one, or create a new empty variant and upload to it.